Woodworker's Journal 2004 Summer, страница 35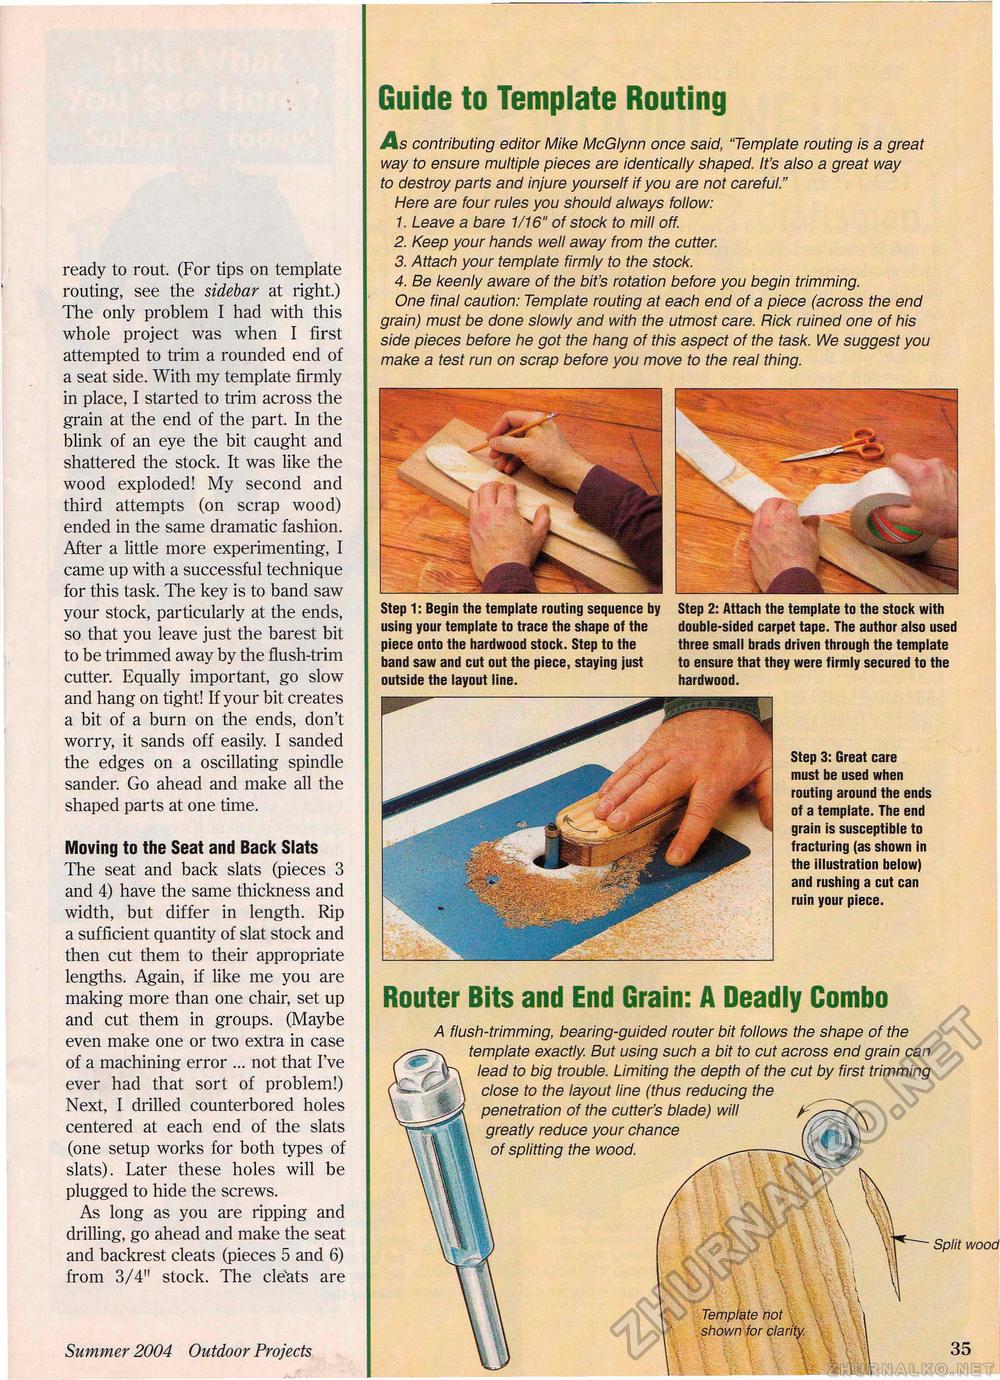
Guide to Template Routing ready to rout. (For tips on template routing, see the sidebar at right.) The only problem I had with this whole project was when I first attempted to trim a rounded end of a seat side. With my template firmly in place, I started to trim across the grain at the end of the part. In the blink of an eye the bit caught and shattered the stock. It was like the wood exploded! My second and third attempts (on scrap wood) ended in the same dramatic fashion. After a little more experimenting, I came up with a successful technique for this task. The key is to band saw your stock, particularly at the ends, so that you leave just the barest bit to be trimmed away by the flush-trim cutter. Equally important, go slow and hang on tight! If your bit creates a bit of a burn on the ends, don't worry, it sands off easily. I sanded the edges on a oscillating spindle sander. Go ahead and make all the shaped parts at one time. Moving to the Seat and Back Slats The seat and back slats (pieces 3 and 4) have the same thickness and width, but differ in length. Rip a sufficient quantity of slat stock and then cut them to their appropriate lengths. Again, if like me you are making more than one chair, set up and cut them in groups. (Maybe even make one or two extra in case of a machining error ... not that I've ever had that sort of problem!) Next, I drilled counterbored holes centered at each end of the slats (one setup works for both types of slats). Later these holes will be plugged to hide the screws. As long as you are ripping and drilling, go ahead and make the seat and backrest cleats (pieces 5 and 6) from 3/4" stock. The cleats are Summer 2004 Outdoor Projects 35 As contributing editor Mike McGiynn once said, "Template routing is a great way to ensure multiple pieces are identically shaped. It's also a great way to destroy parts and injure yourself if you are not careful." Here are four rules you should always follow: 1. Leave a bare 1/16" of stock to mill off. 2. Keep your hands well away from the cutter. 3. Attach your template firmly to the stock. 4. Be keenly aware of the bit's rotation before you begin trimming. One final caution: Template routing at each end of a piece (across the end grain) must be done slowly and with the utmost care. Rick ruined one of his side pieces before he got the hang of this aspect of the task. We suggest you make a test run on scrap before you move to the real thing. Step 1: Begin the template routing sequence by using your template to trace the shape of the piece onto the hardwood stock. Step to the band saw and cut out the piece, staying just outside the layout line. Step 2: Attach the template to the stock with double-sided carpet tape. The author also used three small brads driven through the template to ensure that they were firmly secured to the hardwood. Step 3: Great care must be used when routing around the ends of a template. The end grain is susceptible to fracturing (as shown in the illustration below) and rushing a cut can ruin your piece. Router Bits and End Grain: A Deadly Combo A flush-trimming, bearing-guided router bit follows the shape of the template exactly But using such a bit to cut across end grain can lead to big trouble. Limiting the depth of the cut by first trimming close to the layout line (thus reducing the penetration of the cutter's blade) will greatly reduce your chance of splitting the wood. Split wood |


